TekRevue

  • Home
  • OS X
  • Windows
  • Mobile
  • Games
  • Reviews
  • Editorials
  • Tips
    • Windows
    • Mac
    • Mobile
  • Twitter
  • Facebook
  • Google+
  • Feed
macbook-dual-monitor

 032

OS X

How to Move the Dock to a Another Monitor in OS X El Capitan

By Jim Tanous on January 20, 2016 at 9:00 PM • @mggjim

We’ve previously discussed how users can hide the menu bar in OS X El Capitan, but a commenter on that article was also curious about how users can move the dock to a second display. This has been possible in OS X for many years, but the changes to the dock and menu bar in recent versions of the operating system make it worthy of another look. So, if you’re new to OS X or just brushing up on your Mac skills, here’s how to move your dock and configure your primary display in OS X El Capitan.

Don’t wait another day to Level Up Your Life! Join the Nerd Fitness Rebellion and learn how to use your favorite video games, books, and movies as inspiration for adventure rather than an escape from the grind of everyday life.

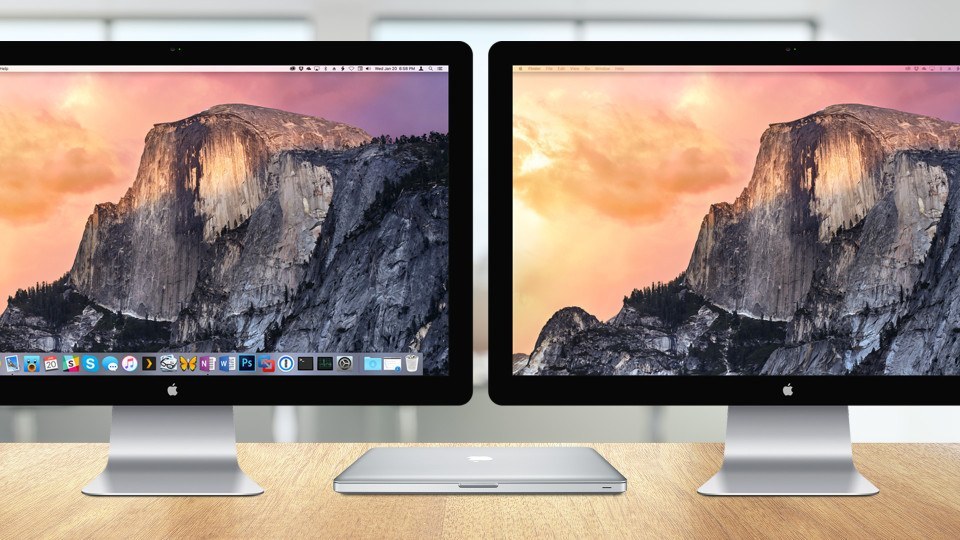
There are many different multi-monitor configurations supported by OS X, and while the steps discussed here will focus on a dual-display configuration, they can be applied equally to other setups. That said, our example setup for this tip is a Mac with two external displays, with the display on the right configured as primary.

mac os x second monitor

Starting with OS X 10.9 Mavericks, OS X will show the menu bar by default on all displays (prior to Mavericks the menu bar only appeared on the primary display), but the default location of your dock and the appearance of desktop icons (if enabled) will tell you which monitor is currently configured as your primary display.

To change this up — for example, if you wanted the monitor on the left to be your primary display — head to System Preferences > Displays > Arrangement. This window will show you the layout and relative resolution of all monitors currently connected to your Mac, including the built-in display on a MacBook, with each monitor represented by a blue rectangle icon.

One of the display icons will have a white bar at the top, representing the menu bar. This depiction is a holdover from older versions of OS X which did not display the menu bar on all monitors, but it helps us identify which monitor is currently set as the primary display.

If you’re connecting many displays to your Mac for the first time and you aren’t sure which icon in System Preferences corresponds to which physical monitor on your desk, simply click and hold on one of the icons and a red border will appear around the monitor it represents.

mac os x identify display

While not directly related to this tip, once you’ve identified all of your Mac’s displays, you can click in the blue area of any display icon and drag and drop it in the appropriate relative position to rearrange your virtual display configuration to match the actual layout of your physical monitors.

Continuing our example, to set the monitor on the left as the primary display, click and hold on the white bar at the top of the right icon and drag and drop it on the left icon.

When you release the white bar on the left display icon, all of your displays will briefly dim to black. When the desktop reappears, your new monitor — in our example, the one on the left — will now contain the dock, active application windows, and any desktop icons.

new primary display second monitor mac

If you don’t like this new arrangement, you can always revert to having the right monitor configured as your primary display by heading back to System Preferences and dragging the white bar back to the desired monitor icon. Other than the brief period in which the displays dim, your changes each time will take effect immediately so there’s no need to reboot or log out in order to see your multi-monitor Mac setup configured with a new primary display.

Move Only the Dock to Another Monitor

Starting with OS X 10.10 Yosemite, there’s a new method for moving just the dock to another display without making changes to your primary display in System Preferences. To try it, simply move your mouse or trackpad cursor to the very bottom of the display where you want your dock to appear and hold it there. After a brief moment, the dock will slide down and out of sight on your primary display and then slide up into view on your other display.

As you can see in the screenshot above, our example Mac now has only the dock on the left monitor, while the desktop icons and active windows associated with your primary display configuration remain on the right monitor. Once the dock is located on your desired monitor, you can easily reposition it to the left, right, or default bottom of the screen as needed.

Want news and tips from TekRevue delivered directly to your inbox? Sign up for the TekRevue Weekly Digest using the box below. Get tips, reviews, news, and giveaways reserved exclusively for subscribers.

 032

  • Categories: OS X
  • Tags: #Desktop #Displays #Dock #How To #Mac #Menu Bar #Monitor #OS X #System Preferences #Tips #UI Customization

Sign Up for the TekRevue Weekly Digest

Read more in OS X on TekRevue

  • gatekeeper el capitan
    How to Permanently Disable Gatekeeper in OS X El Capitan

    Filed Under: OS X

  • el capitan transparency
    How to Reduce Transparency in OS X El Capitan

    Filed Under: OS X

  • replace login screen wallpaper os x el capitan
    How to Replace the OS X El Capitan Login Screen Wallpaper

    Filed Under: OS X

Search

Related Articles

  • el capitan transparency
    How to Reduce Transparency in OS X El Capitan
  • Mac OS X Dock
    How to Dim Hidden Mac App Icons in the Dock
  • Ollyy / Shutterstock
    Two Quick Ways to Show OS X Dock Apps in Finder
  • Mac OS X Dock
    The Complete Guide to Customizing the Mac OS X Dock

Connect with TekRevue

  • TekRevue on Twitter
  • TekRevue on Facebook
  • TekRevue on Google+
  • Cheats
  • Deals
  • Distractions
  • Editorials
  • Gadgets
  • Games
  • Giveaway
  • Hardware
  • Mobile
  • News
  • More in OS X
  • Podcast
  • Reviews
  • Sponsor
  • Tips
  • Windows
  • macbook-dual-monitor
    How to Move the Dock to a Another Monitor in OS X El Capitan
  • gatekeeper el capitan
    How to Permanently Disable Gatekeeper in OS X El Capitan
  • el capitan transparency
    How to Reduce Transparency in OS X El Capitan
  • replace login screen wallpaper os x el capitan
    How to Replace the OS X El Capitan Login Screen Wallpaper
  • Mac OS X Dock
    How to Dim Hidden Mac App Icons in the Dock
  • file-path-mac
    OS X El Capitan: How to Copy a File Path in Finder
  • raid os x el capitan
    How to Create RAID Volumes in OS X El Capitan
  • using macbook trackpad
    How to Turn Off Force Touch in OS X El Capitan
  • shake cursor large os x el capitan
    How to Stop Your Cursor from Getting Bigger in OS X El Capitan
  • split view not working
    El Capitan’s Split View Not Working? Check This Option in System Preferences
  • os x el capitan
    New in OS X El Capitan: How to Hide the Menu Bar
  • finder file path directories
    How to Show the Current Path in the Finder Title Bar
  • cancel-apple-music
    How to Cancel Apple Music Before the Free Trial Ends
  • os x autocorrect
    Avoid the Frustration: How to Disable AutoCorrect in OS X
  • os x danger warning
    How to Disable ‘Are You Sure You Want to Open This File?’ Warnings in OS X
  • imac-pixels
    How to Enable HiDPI Mode in Mac OS X
  • pdf mac os x
    How to Extract Pages from a PDF Document in Mac OS X Preview
  • airplay mac output
    How to Stream All Mac Audio Via AirPlay
  • mac-menu-bar-clock-and-date
    How to Show the Current Date in the Mac OS X Menu Bar
  • ios-capture-mac
    How to Take an iOS Screenshot Directly From Your Mac

Tips

  • Apps
  • Gaming
  • Mac
  • Mobile
  • Online
  • Windows
  • office 365 installer
    How to Install the Older Office 2013 via Office 365
  • itunes 12 separate download window
    iTunes 12: How to Show a Separate iTunes Downloads Window
  • remove creative cloud files file explorer
    How to Remove Creative Cloud Files from the File Explorer Sidebar in Windows
  • chrome offline installer
    How to Download the Chrome Offline Installer
  • steam trash
    How to Remove a Game From Your Steam Library
  • xbox one elite controller
    How to Use Custom Button Mapping on the Xbox One
  • xbox one 60fps 1080p windows 10 streaming
    How to Use 1080p/60fps Xbox One Streaming in Windows 10
  • gta 5 custom music
    How to Use Custom Music and the Self Radio Station in Grand Theft Auto V
  • macbook-dual-monitor
    How to Move the Dock to a Another Monitor in OS X El Capitan
  • gatekeeper el capitan
    How to Permanently Disable Gatekeeper in OS X El Capitan
  • el capitan transparency
    How to Reduce Transparency in OS X El Capitan
  • replace login screen wallpaper os x el capitan
    How to Replace the OS X El Capitan Login Screen Wallpaper
  • request desktop site ipad reload
    The Fastest Way to Request a Desktop Site in Safari for iOS 9
  • apple tv siri remote
    How to Check the Siri Remote Battery Life on the Apple TV
  • new-apple-tv-home-screen
    How to Move and Delete Apple TV Apps
  • record 4k iphone 6s
    How to Record 4K Video on the iPhone 6s
  • netflix bandwidth data usage
    How to Reduce Netflix Bandwidth Usage to Avoid ISP Data Caps
  • netflix autoplay
    How to Stop Netflix From Automatically Playing the Next Episode
  • distracted man computer
    How to Turn Off Distraction-Free Mode in WordPress
  • watch super bowl online
    Attention Cord-Cutters: How to Watch the Super Bowl Online
  • file explorer keyboard
    Use Drag & Drop Keyboard Shortcuts to Copy or Move Files in Windows
  • windows lock screen wallpaper
    How to Find Windows Spotlight Lock Screen Images in Windows 10
  • cpu processor glow
    How to Restrict Apps to Specific CPU Cores with Processor Affinity
  • remove recycle bin windows 10 desktop
    How to Remove Recycle Bin from the Windows 10 Desktop
Company
  • About TekRevue
  • Get in Touch
  • Sponsorships

Sign Up for the TekRevue Weekly Digest

© TekRevue LLC. All Rights Reserved.

  • TekRevue User Agreement
  • TekRevue Privacy Policy

Built by Blazer Six